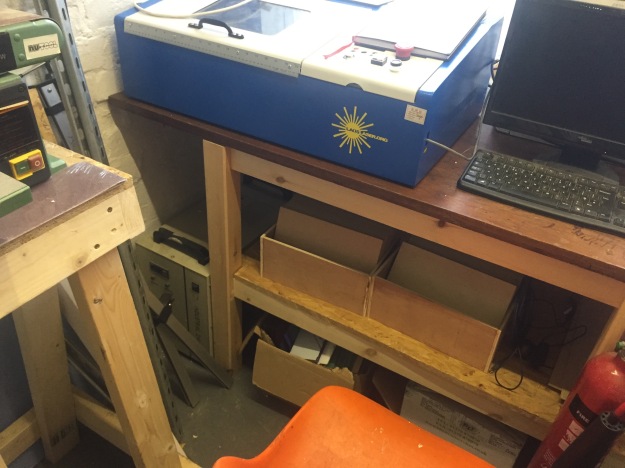
The Sheffield Hackspace needed a better set up to make there laser cutter more accessible and easier to work around. Currently there was a small temporary bench with an old desk worktop on it. It was not the most stable work surface in the world and there was very little work surface for assembling parts etc and the current bench didn’t provide much storage space because of the height of it’s shelf. The high of the worktop also needed to be increased as some people strained to lean over and operate the laser cutter.
With these points in mind I began to sketch out some ideas on paper. The current bench was sat in front of the window at the far end of the workshop and was 1350mm long, the new bench would span the width of the workshop at 2400mm. There also needs to be room to incorporate the laser chiller this was 280mm wide the easiest way to make a place to put it was to shorten the whole frame down to 2100mm and let the worktop over hang the gap, as for the height it was brought up to 925mm, at this height the work top would sit level with the windowsill. The bench frame will be supported with 6 posts and joined using through morits and tenon joints, There will be a shelf running through the centre for storage of large sheet goods. I drew up a 3D CAD model using FreeCAD to plan out the design.
With the 3D model made and all of the timber cut down to length the mortises where marked out. To ensure that all of the measurements where consistent I marked all the heights of the mortises on an off cut of ply the same height as the posts. This was then held flush with the base of the post whiles the marks where transferred over and extended with a square, with that done the width of the mortise was marked on using a mortise marking gauge.
Using a 15mm forstner bit set to a depth of 45mm in the drill press I removed the bulk of the waste material. Followed the rest of the waste material being removed with a chisel using the same technique u sed in previous projects, this was process was repeated for all 24 mortises. I then rounded over the edges of the posts using a 1/2″ round over bit.
The ends of the through tenons where cut using the band saw, I set up the fens and a stop block to cut the ends accurately. With all the ends of the through tenons cut I began to assemble the middle, left and right hand side sections. Glue was applied in the mortises and the through tenons where inserted it to the mortises. The assembly was held together with a pair of sach camps whilst I drilled a countersunk pilot hole and drove a screw.

With the 3 cross sections completed I began to assemble the frame together by laying down one end section and applying more glue in the mortises then setting the 4 cross shelf supports in place and driving a screw in from behind. I then added the middle section and repeated the same process for the top half of the bench.
I then turned the workbench around the right way up and butted it up against the wall on the right. I cut two shelf’s out of OSB and fitted them around the square posts then dropped them in place. The worktop was then cut to length and width, for transportation purposes it was cut into two separate pieces. It was then secured with a screw countersunk in to each corner of each half of the worktop.
Overall this has been a great project and makes much better use of the back end of the workshop, there is more room for assembling prototype models to the right and an additional shelf for storing consumables. The bench is strong and sturdy and it will take many years of use to come.
For more build image visit my Flicker page.


